Guild Of Sleepers
  • Home
  • Uru
    • F.A.Q. >
      • Red & Green Markers
      • CGZM Missions >
        • CGZM Mission 1
        • CGZM Mission 2
        • CGZM Mission 3
        • CGZM Mission 4
        • CGZM Mission 5
        • CGZM Mission 6
        • CGZM Mission 7
        • CGZM Mission 8
        • CGZM Mission 9
        • CGZM Mission 10
        • CGZM Mission 11
        • CGZM Mission 12
        • CGZM Mission 13
        • CGZM Mission 14
    • Basic Stuff >
      • A Guide To KI Time
      • Door Runs Explained
      • Relto Donuts
      • How To Share A Book Or Stone
      • How To Change Neighborhoods
      • How To Use The KI - Not So Basic Stuff
      • How To Use The KI - Adding Buddies And Sending Invites
      • MOULa Etiquette
    • Not So Basic Stuff >
      • How To Play Ayoheek
      • How To Help Open The Door In Ahnonay
      • How To Swim Against The Current In Ahnonay
      • How To Solve The Puzzles In Kadish Tolesa
      • How To Work Out The Control Panel For Kadish Tolesa Vault
      • How To Add Nexus Locations To Your Nexus Terminal
      • How Far Can You Get Without Going To The Cleft First?
    • Veteran Stuff >
      • Minkata For Advanced Players
      • A Game For Jalak
      • Jumping Around Jalak
      • Collecting Feathers
      • The Pellet Point Glitch
      • KI Light Glitch
      • Avatar Face Shot For Login Screen
      • Seasonal Freebies And Features
  • Obduction
    • Understanding Base 4
    • Hunrath
    • Farley's House
    • Maray

Avatar Face Shot For Login Screen
Written by Lady Marion

I struggled to find this info when I was trying to find out how to do this.

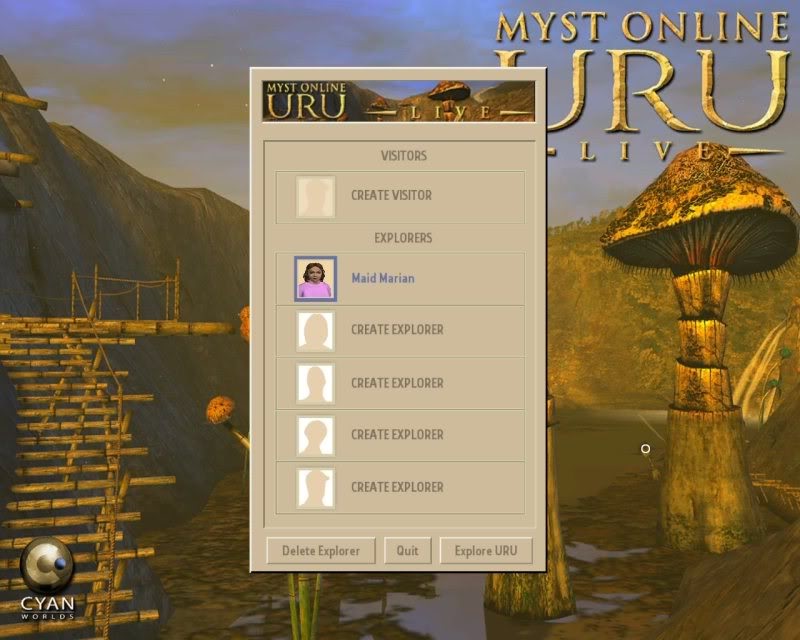
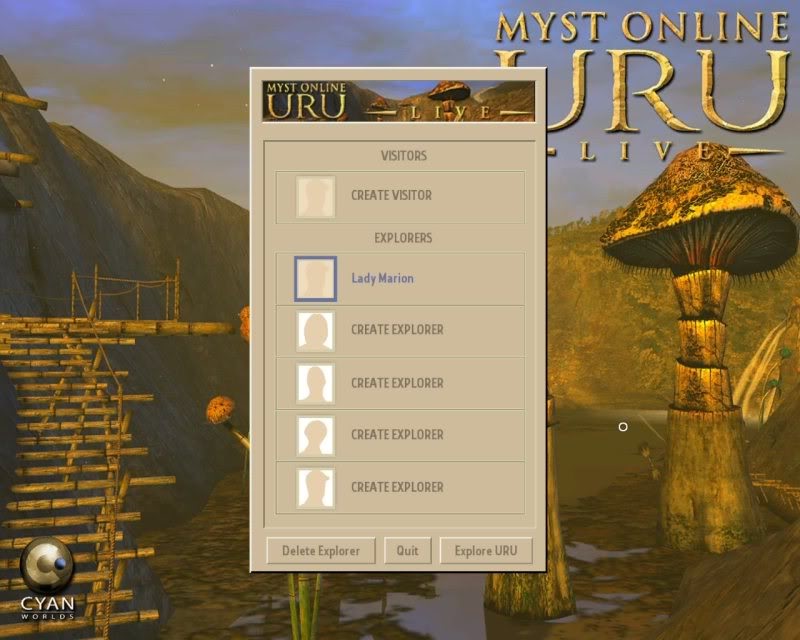
So, when you first create an account your login screen will look something like this, with a space next to your avatar’s name for a picture.

Picture
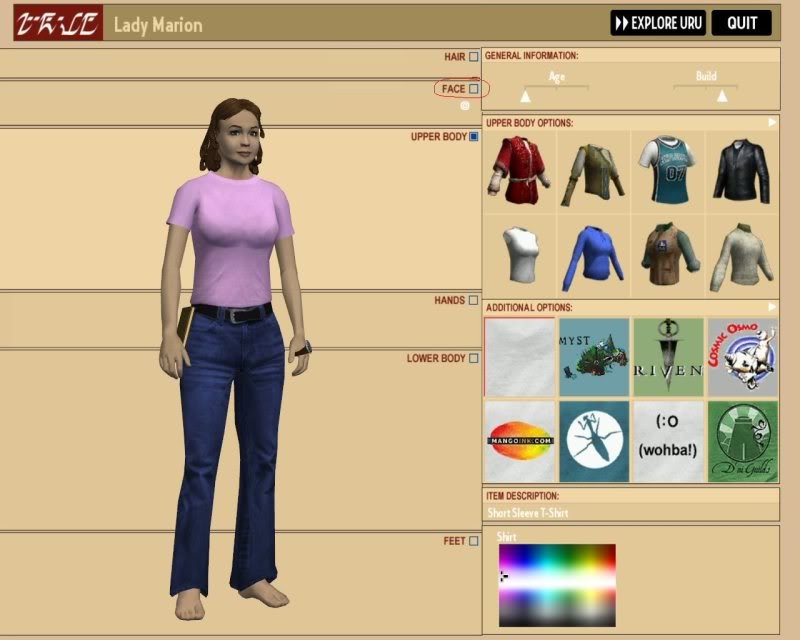
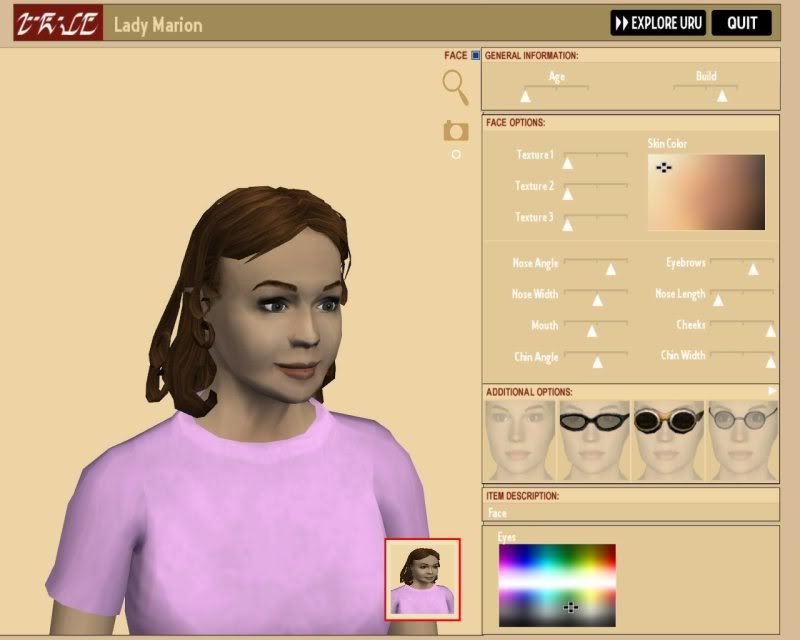
To take a face shot for the log in screen you will need to go into your wardrobe in relto. Click where it says “face” to zoom in on your avatar’s face, as highlighted in the picture below.
Picture
To take the shot of your avatar’s face, simply click on the camera icon, as show below.
Picture
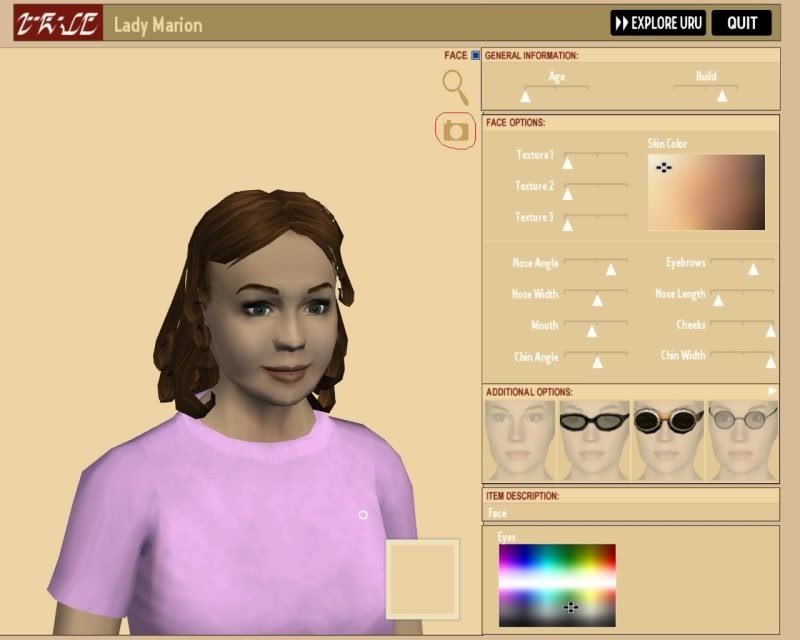
You will then see a preview of your faceshot in the little box highlighted below in red. When you are happy with your face shot, exit the wardrobe & resume playing uru.
Picture
When you next log in you will see your face shot on your login screen, like this:
Picture
Powered by Create your own unique website with customizable templates.
  • Home
  • Uru
    • F.A.Q. >
      • Red & Green Markers
      • CGZM Missions >
        • CGZM Mission 1
        • CGZM Mission 2
        • CGZM Mission 3
        • CGZM Mission 4
        • CGZM Mission 5
        • CGZM Mission 6
        • CGZM Mission 7
        • CGZM Mission 8
        • CGZM Mission 9
        • CGZM Mission 10
        • CGZM Mission 11
        • CGZM Mission 12
        • CGZM Mission 13
        • CGZM Mission 14
    • Basic Stuff >
      • A Guide To KI Time
      • Door Runs Explained
      • Relto Donuts
      • How To Share A Book Or Stone
      • How To Change Neighborhoods
      • How To Use The KI - Not So Basic Stuff
      • How To Use The KI - Adding Buddies And Sending Invites
      • MOULa Etiquette
    • Not So Basic Stuff >
      • How To Play Ayoheek
      • How To Help Open The Door In Ahnonay
      • How To Swim Against The Current In Ahnonay
      • How To Solve The Puzzles In Kadish Tolesa
      • How To Work Out The Control Panel For Kadish Tolesa Vault
      • How To Add Nexus Locations To Your Nexus Terminal
      • How Far Can You Get Without Going To The Cleft First?
    • Veteran Stuff >
      • Minkata For Advanced Players
      • A Game For Jalak
      • Jumping Around Jalak
      • Collecting Feathers
      • The Pellet Point Glitch
      • KI Light Glitch
      • Avatar Face Shot For Login Screen
      • Seasonal Freebies And Features
  • Obduction
    • Understanding Base 4
    • Hunrath
    • Farley's House
    • Maray